Mailinabox is a script that turns your VPS into an Email and DNS server. It also has a web interface to send and receive Email like Gmail and Hotmail, only no advertising or snooping. The control panel also makes it super easy to configure the DNS for your domains. DNS and Email are 2 things I have always struggled with, this script makes it simple to run and configure both.
You will need a domain for this tutorial. It is a good idea to make sure neither your domain or IP number are on any blacklists, this will degrade the deliverability of your Email. You can check them both at MxToolBox.com. This domain will be your email address (anything@yourdomain.com) and your “vanity” nameservers (ns1.box.yourdomain.com and ns2.box.yourdomain.com). You will have to change the nameservers of your domain to ns1.box.yourdomain.com and ns2.box.yourdomain.com after you run the script which automatically creates the nameservers. You will also have to change the reverse IP to box.yourdomain.com. A lot of hosting companies have a control panel where you can change your reverse IP. If your host does not have a control panel for this you will have to contact support and have them do this once you run the script.
When creating your virtual machine make the hostname “box.yourdomain.com” or change the hostname to this if you already created it. The script will not work unless the hostname is box.yourdomain.com.
Mailinabox advises a clean install of Ubuntu 14.04 with at least 1GB of RAM. The script will not install on anything other than Ubuntu 14.04. The Proxmox, ubuntu-14.04-standard lxc template works well with this script.
So assuming you have a domain, a Ubuntu 14.04 VPS or server, your hostname set to box.yourdomain.com, we can start the installation. I will be using the domain vpsprojects.win to illustrate this tutorial, it was only .95 cents to register it at porkbun.com.
First we login SSh as root and update the server to make sure we have the latest packages insalled.
apt-get update
and
apt-get upgrade
The we install Curl
apt-get -y install curl
Now we download and install all the packages:
curl -s https://mailinabox.email/setup.sh | sudo bash
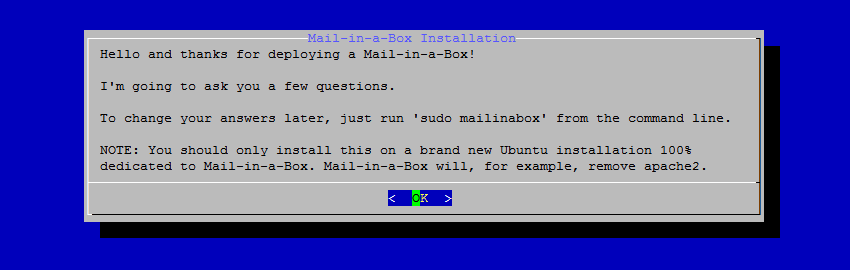
After a while you will be presented with this screen, just hit the enter button on your keyboard.
Then you will see this screen:
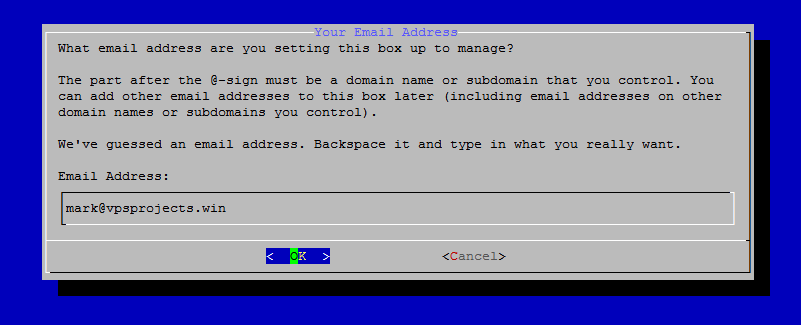
Hit the tab button your keyboard to navigate to the box that contains the email address and type in the email address you would like to use with this domain. You can easily add more later. Then tab to “ok” and hit enter.
Your VPS hostname should already be named box.yourdomain.com . I wouldn’t recommend changing this.
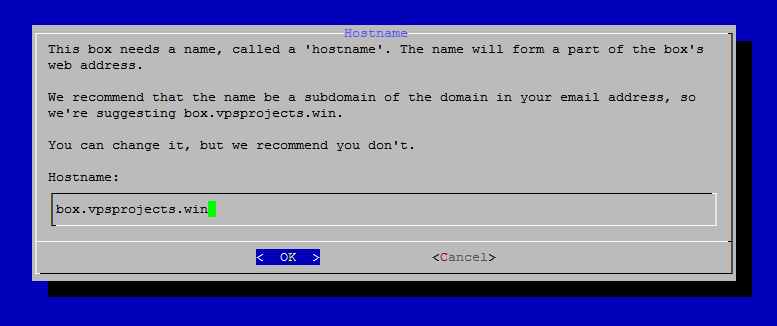
Tab to “OK” and hit enter on your keyboard.
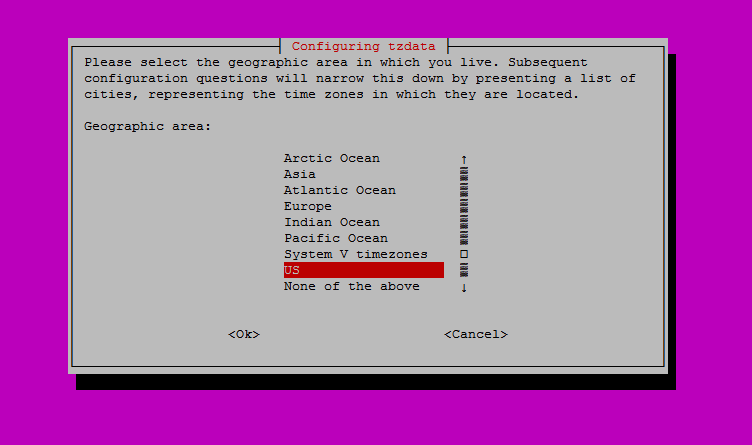
Next, select you Geographical area and “OK”
Then select your time zone.
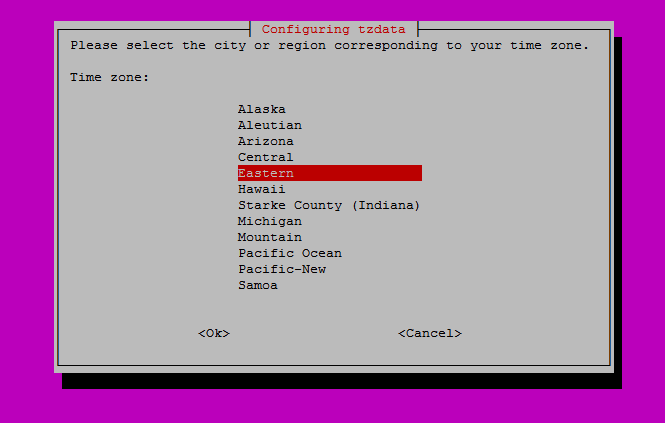
After you have selected your time zone tab to “OK” and hit enter.
The script will now configure all the packages on your VPS.
Enter the password you would like to use to access your Email and control panel twice.

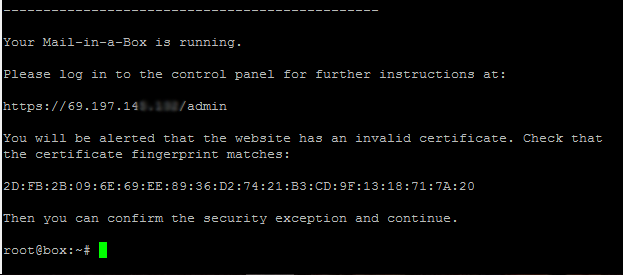
Mailinabox installation is now complete.
Now is the time to go to your domain registrar and create nameservers, ns1.box.yourdomain.com and ns2.box.yourdomain.com. In my case it would be ns1.box.vpsprojects.win and ns2.box.vpsprojects.win . When it asks for an IP number use the IP number your VPS or server resides on. After your nameservers are created, change the nameservers of yourdomain.com to ns1.box.yourdomain.com and ns2.box.yourdomain.com, the nameservers you just created.
You must also assign box.yourdomain.com as the reverse for your IP number. Use either your host’s control panel or their ticketed support system. It takes up to 2 days for the DNS changes to make it around the world. I tried for a while to change my reverse IP at my host and it wouldn’t go because it said it could not authenticate the info I was entering. The next morning it worked. I have found that most changes take between 5 minutes and 2 hours.
Login to your Mailinabox control panel https://your_IP_number/admin Use the email address and password you made when running the setup script.
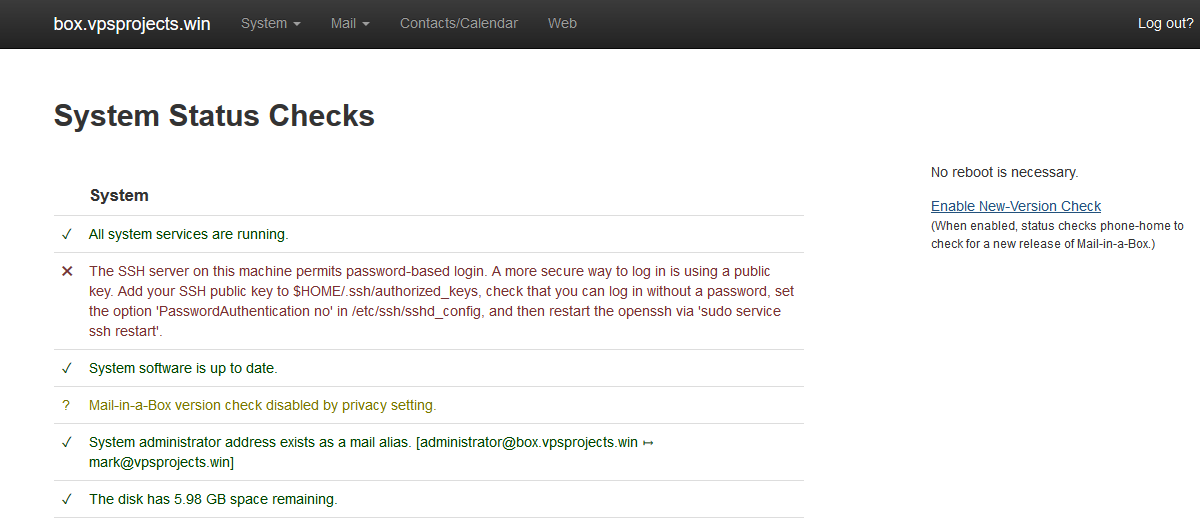
The first page you get to shows you the status of your mail server and makes suggestions to improve the deliverability of your Email. Deliverability can be checked at mail-tester.com and emailsecuritygrader.com .
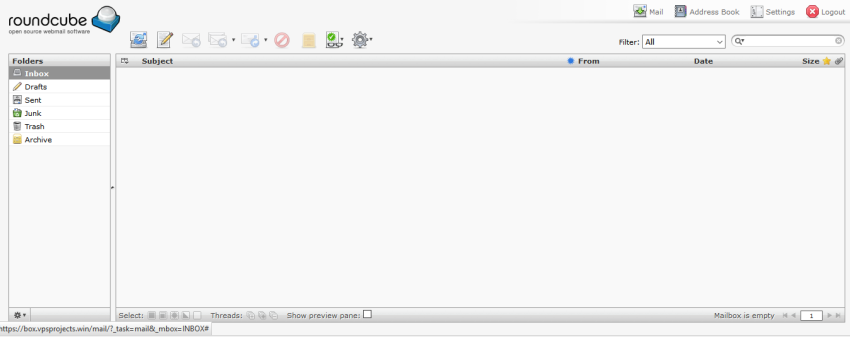
Your Roundcube webmail panel is available at https://box.yourdomain.com/mail/ use the same username and password you made during script installation.
I like to run Mailinabox as a standalone Email and DNS server. I don’t run anything else on this VPS. If I broke it I would have a hard time fixing it, so I don’t want to start adding additional software.
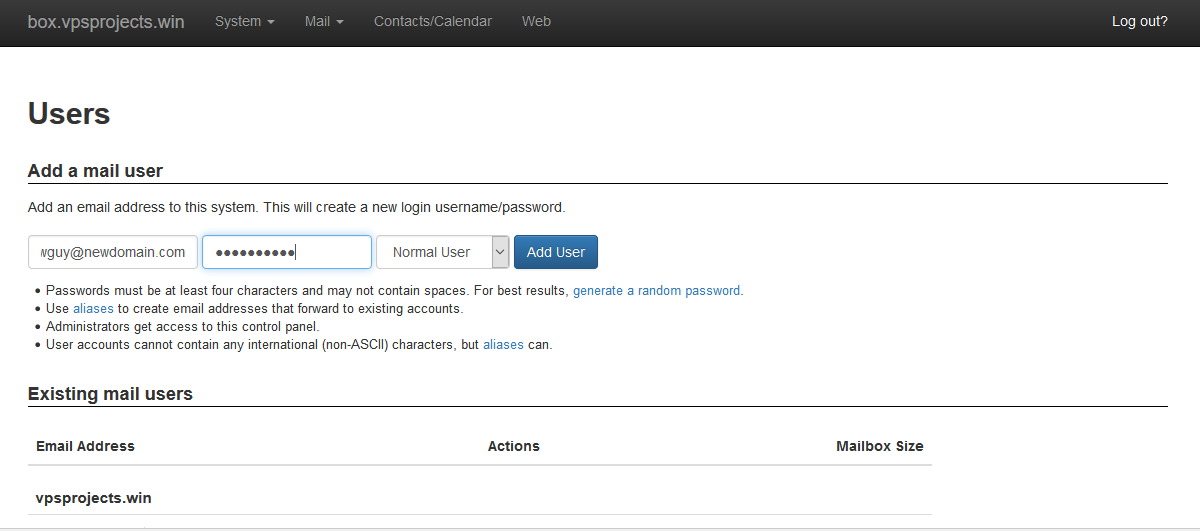
To add additional domains simply change the nameservers at your registrar of the domain you want to add to ns1.box.yourdomain.com and ns2.box.yourdomain.com, the same nameservers Mailinabox is running on. Go to the control panel Mail==>Users and add an email address with the domain you are adding to the server and any user you please (newguy@newdomain.com) and a password for the account. Make the user either a “Normal User” or an “Administrator” . That’s all there is to it. That adds the domain to the DNS server, the web server and the email server.
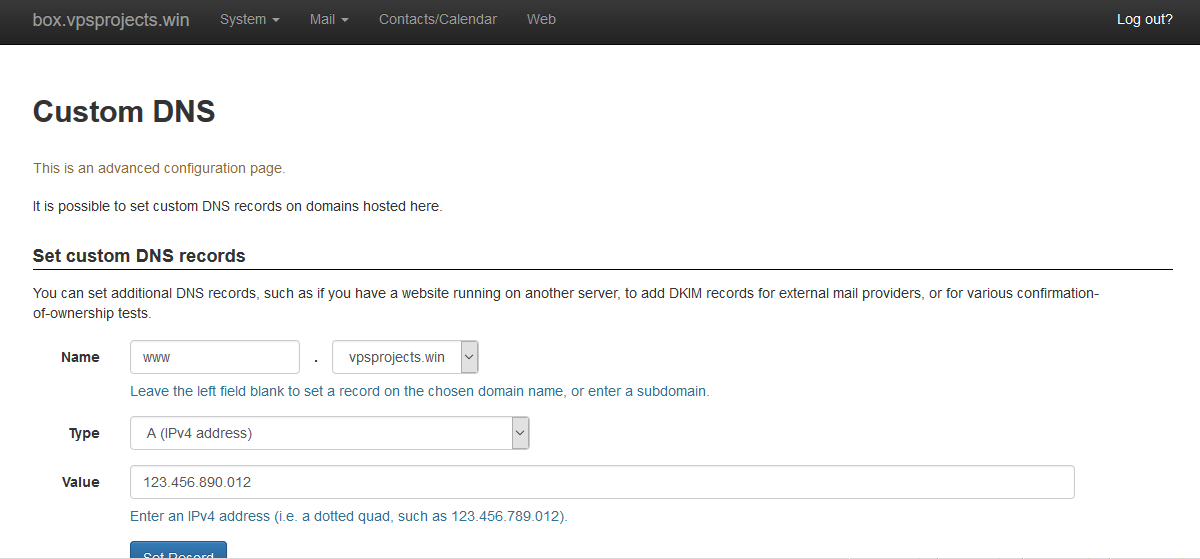
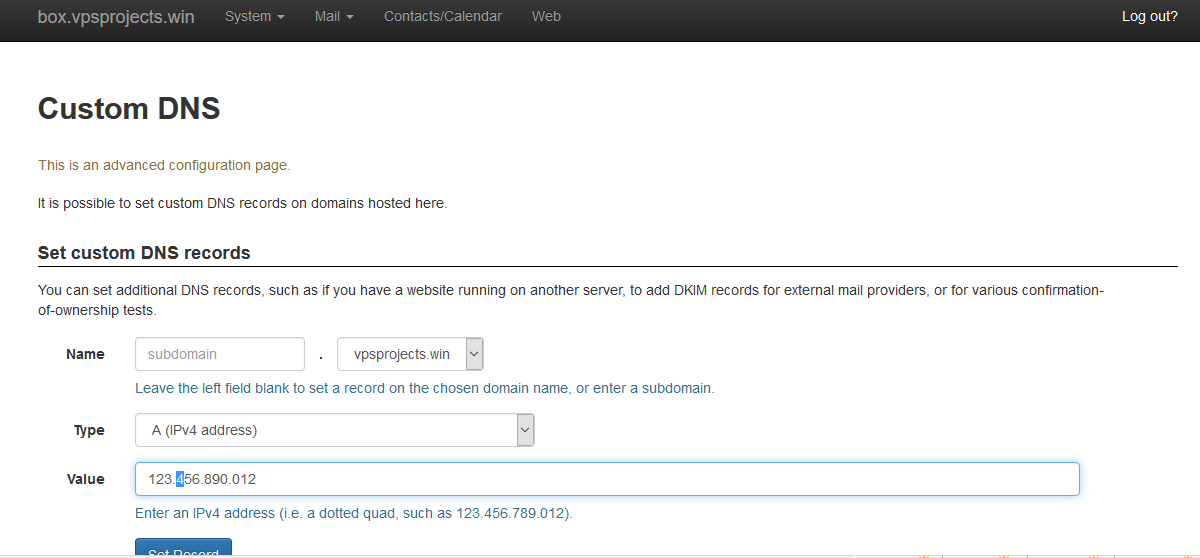
To use Mailinabox as your email server and another VPS or server as your webserver you must configure the DNS in the Mailinabox control panel. Go to System==>Custom DNS and select the domain you would like to configure, the “A” record for Type and fill in the proper IP number.
Don’t forget the WWW