This is a quick and easy way to make a free OpenVPN on your VPS. This script works with most operating systems. I have ran it on Centos, Debian and Ubuntu without any problems. We will be using the free NYR script. This runs without a problem on KVM, but LXC containers need a little tweaking to the configuration file. For Proxmox LXC containers we must edit /etc/pve/lxc/###.conf , where ### is your container ID number.
Append the following 2 lines to the bottom of the file without touching anything above it.
lxc.cgroup.devices.allow = c 10:200 rwm

lxc.hook.autodev = sh -c "modprobe tun; cd ${LXC_ROOTFS_MOUNT}/dev; mkdir net; mknod net/tun c 10 200; chmod 0666 net/tun"
Restart the container /sbin/reboot
Log back in SSh as root and run the following command, this will download the script.
wget git.io/vpn --no-check-certificate -O ~/openvpn-install.sh; bash openvpn-install.sh
Make the script executable by root:
chmod 744 openvpn-install.sh
Then run the script as root:
./openvpn-install.sh
When the script initializes it will ask you five questions. I always accept the default options for the first 4 questions and change the client name to a easily remembered name for the fifth question. In this case I named it “vps”.
When the script finishes it will tell you that your new VPN client configuration file is available in the /root directory..
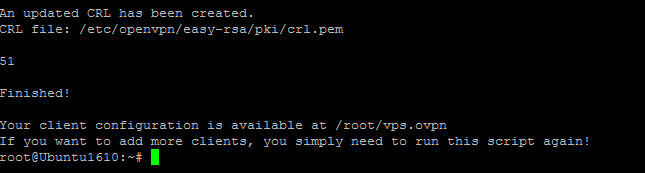
We can see from the image above that my configuration file is /root/vps.ovpn . Transfer your .ovpn file from your server to your local computer and download and install the free OpenVPN client for your computer.
After you have installed the OpenVPN client on your local machine, paste the .ovpn file you downloaded from your VPS to your OpenVPN config directory. On my Windows 10 laptop it is my C:\Program Files\OpenVPN\config directory.
Open the OpenVPN client on your local computer and click connect. If everything went OK it will connect you to your new VPN in a few seconds.